Deviation Actions

How I Art Doll
3. Armature
How strong your armature needs to be will depend on the size of your doll, how tightly you wrap the stuffing, how tightly the fabric is sewn on, and how flexible the fabric is. I can give you an idea of where to start, but as you create your own dolls, you will find what works best for you.
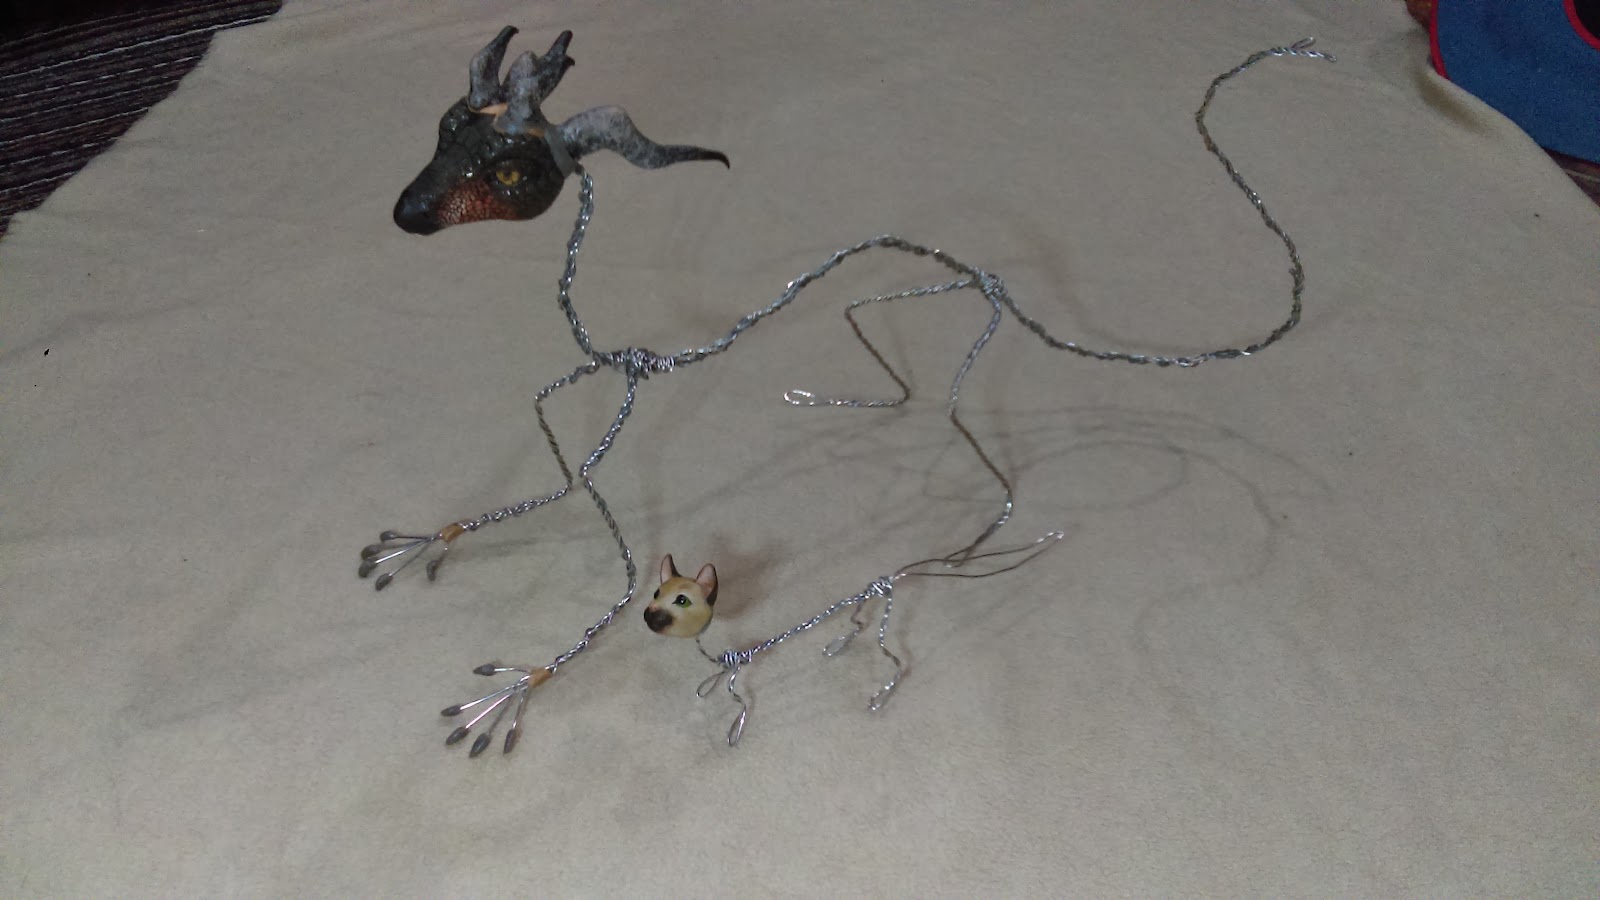
The armature of my large 3 foot long dragon next to the armature of my tiny cat otter.
For every doll, I make a life-size sketch to use as a reference for size and proportions, I also use it to measure my wire. I generally use 2 wires twisted together for every part including the tail, with even more wires for larger dolls. I sometimes use pipe cleaners for some small dolls, fingers, and ears, it’s less stressful on clay parts, as well as easier to pose. You’ll definitely want to at least double up the pipe cleaner.

I like to add thermoplastic “bones”, to me it feels more sturdy, helps with posing, helps the straight parts of the legs stay straight, and hides and merges the ends of wires. If you do add bones, leave plenty of room in between for the joints to bend without extra stress, and to have more space for range of motion. I don’t put bones on small dolls, because there just isn’t enough space. More information on thermoplastic parts in section 10. Thermoplastic.
I make my clay pieces separate from the armature. After baking the head, I attach it to the armature with a good amount of hot glue, which bonds well to the aluminum core. Tip: curl over the end of any wire you’re attaching to clay parts to give it more grip. I attach feet to the armature with epoxy, since I make my feet without an aluminum core.

If you’re twisting together some really long wire, attaching it in an electric drill while holding the opposite end of the wire with pliers makes for quick, easy, clean work! Just be careful not to let the sharp ends loose while it’s spinning. Actually, be careful of the cut ends of wires all the time!
Adding the limb wires in as you’re twisting up the spine wire interlocks them for quicker, cleaner attachment. After the limb ends are wrapped up around the spine wire, I fill the gaps between with hot glue and it gets rid of any wobble.
If you’re going to twist wires together, you’ll lose some length, and be sure to account for extra length needed for connecting to other parts.
The shorter a neck is, the less it will be able to pose. When the doll is completely finished - if the neck is too long, you can push it into an S shape making it appear shorter, but if the neck is too short, well you're kinda stuck with it.
If the doll’s head is too heavy, counter weight it with some heavy things glued or sewn in a pouch to the hips or thighs.


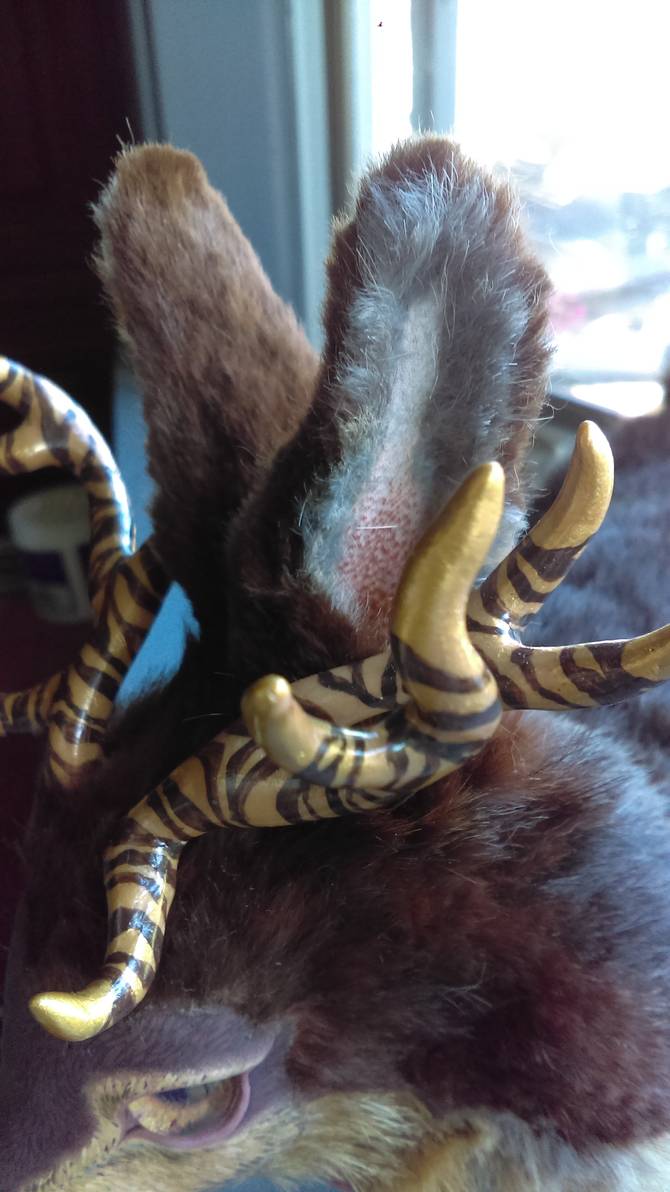
An example of soft wired ears on my jackalope doll.