Deviation Actions
How I Art Doll
11. Thermoplastic
Thermoplastic is a moldable plastic that can be sculpted, but it is VERY different than working with polymer clay! Do not be discouraged though, all it takes is a bit of practice. This is a wonderful material, extremely useful once you figure it out.
Instamorph is a well known brand, but I prefer Polly Plastics because it sticks to things and stays malleable for longer. Just heat up your plastic with hot water and sculpt, but be careful not to burn yourself. Also be careful about setting down softened plastic, especially the Polly Plastics brand - it likes to sink into and fuse to the cloth that I use for dabbing water off.
You can paint the plastic but if you want chip proof color, you can get colored pellets to mix in.
Once the plastic is heated thoroughly and turns clear, it acts a bit like a very thick liquid. Almost like slow moving lava, if you set a hot ball of plastic on the counter it will slowly flatten, antlers will sag as they cool. You’ll get used to working around this with experience. If re-dip your thermoplastic piece for a few seconds, it will soften just the top layer and cause it to become smooth, repeat a few times to remove fingerprints or blemishes.

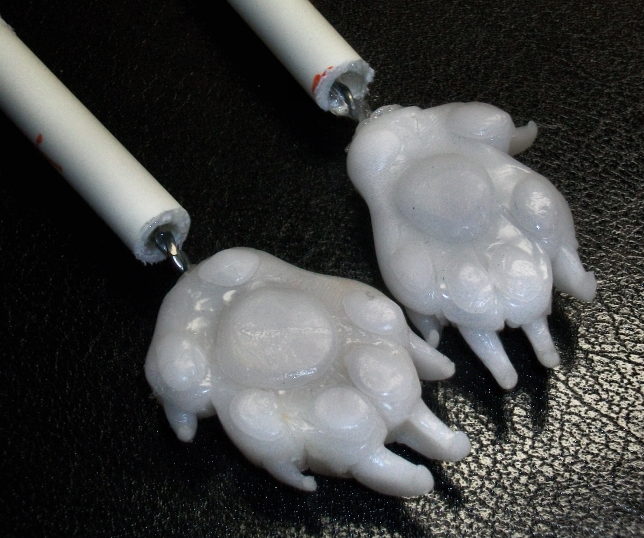
Here are some paws I made as an experiment. They were going to be for my wooly dragon, but I decided to give him soft paws instead. Nice thing is you can easily recycle your thermoplastic parts into something else!


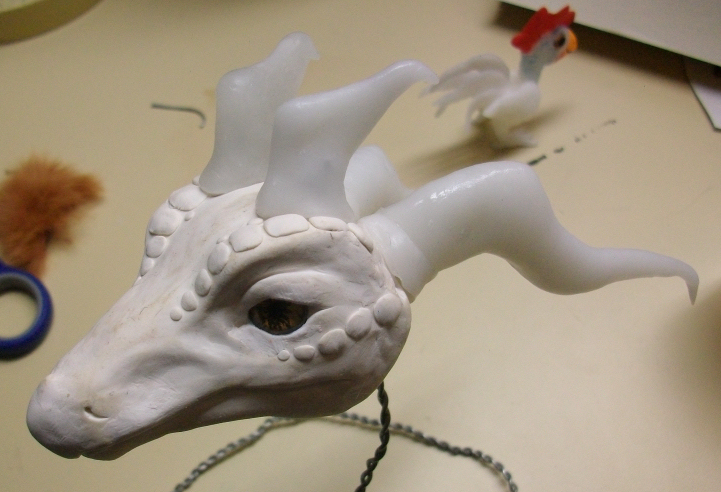
I made these horns by layering rectangle shaped pieces over a solid core. Make a quick dip afterwards to make sure the pieces have bonded together. For an ideal bond, you want to stick hot plastic to hot plastic.
It takes some learning, but certain details are easier to sculpt at certain points during the cooling of the plastic. A lot like air dry sculpting mediums, you’ll want to first crudely shape it, wait a few seconds, refine the shape some more, and repeat. If you are attaching it to a wire, you'll want to focus on getting a good attachment first, do not mess with it around the wire too much while it cools or you will have a loose connection. My favorite quality of Polly Plastics is that it grips onto wire when it’s nice and hot making good attachment easy. Twist the wires to give the plastic more to grip on.


I also use Polly Plastic over the area where multiple wires join to stabilize them, and to keep the ends from poking out later. Similarly, I use it as "bones" to keep certain areas of the wire from bending, making it easier to pose and giving the leg more stability, and helps keep the straight parts of the legs straight. You can see in the photo of the wyvern below, the peanut butter colored plastic bits are what I'm referring to. And as you can see, I like this material for claws/nails too. They are tiny but unbreakable, and since they don't flex, they can get a good grip on things like tree bark and perches. Curl the end of the wire over to make sure the claws don't pop off later.


After I made my horns for my dragon, I messed around with the leftover plastic and found a way to make a cool texture! Just stretch and fold, stretch and fold, stretch and fold. The second photo is the same but it was twisted afterwards! I'll definitely be trying these techniques for future horns!